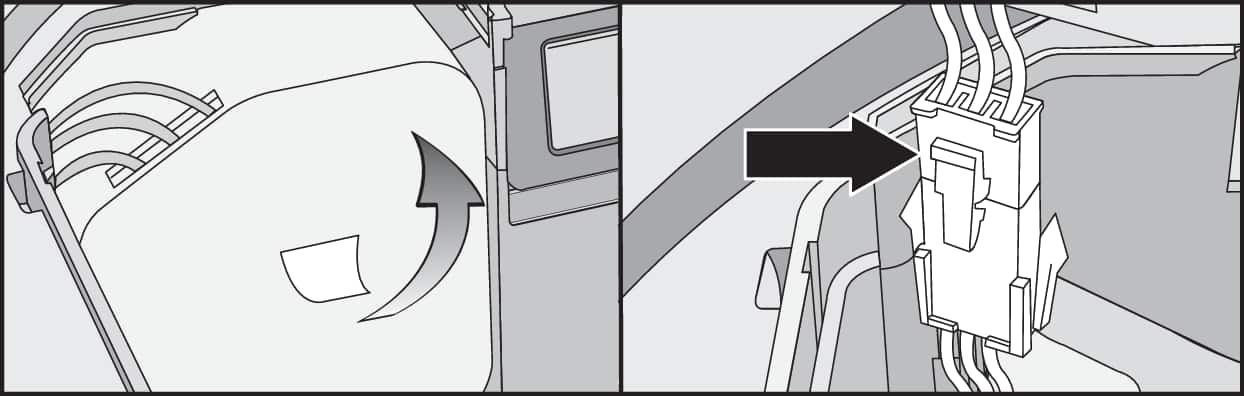
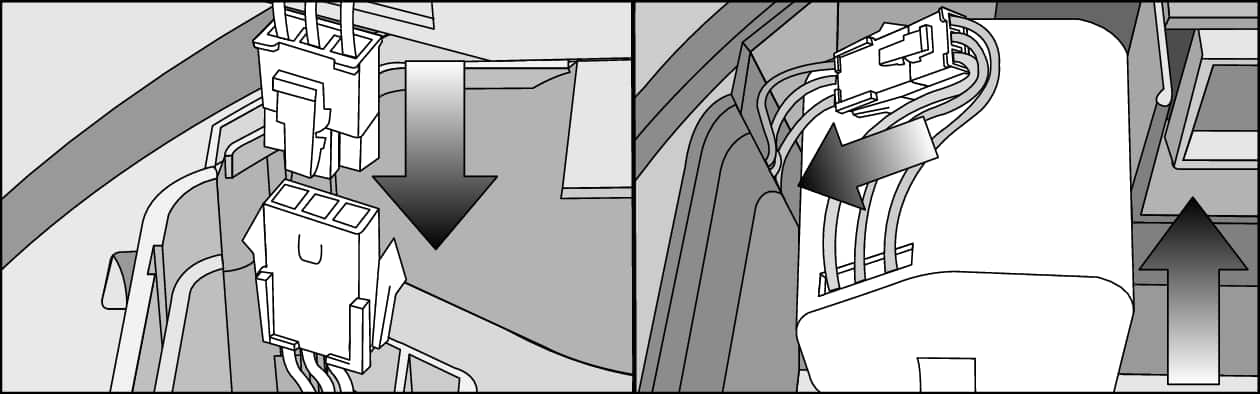
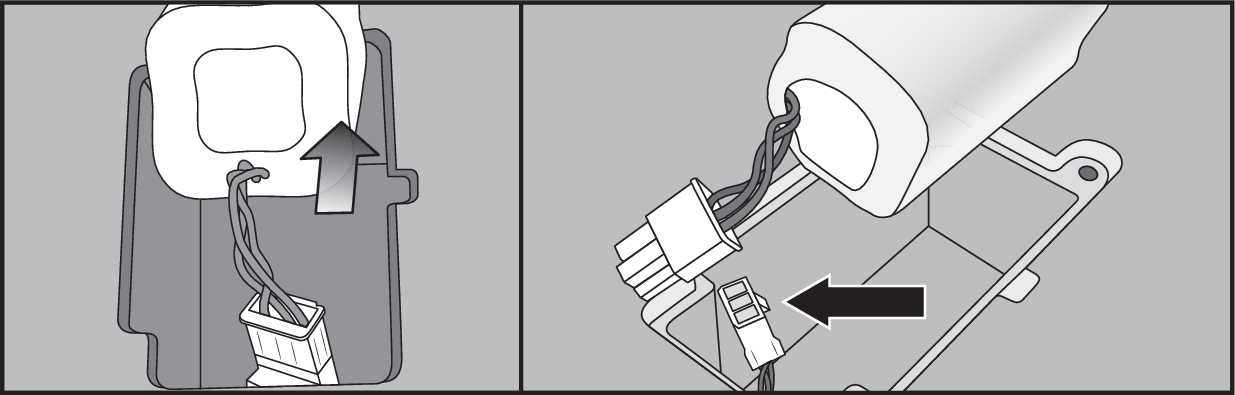
Switch the robot vacuum cleaner off. The switch is located on the side of the robot vacuum cleaner. Depending on the model, press the I/0 switch to switch position 0 or the ON/OFF switch to switch position OFF.
Cleaning the RX2 and RX3 roller brush:
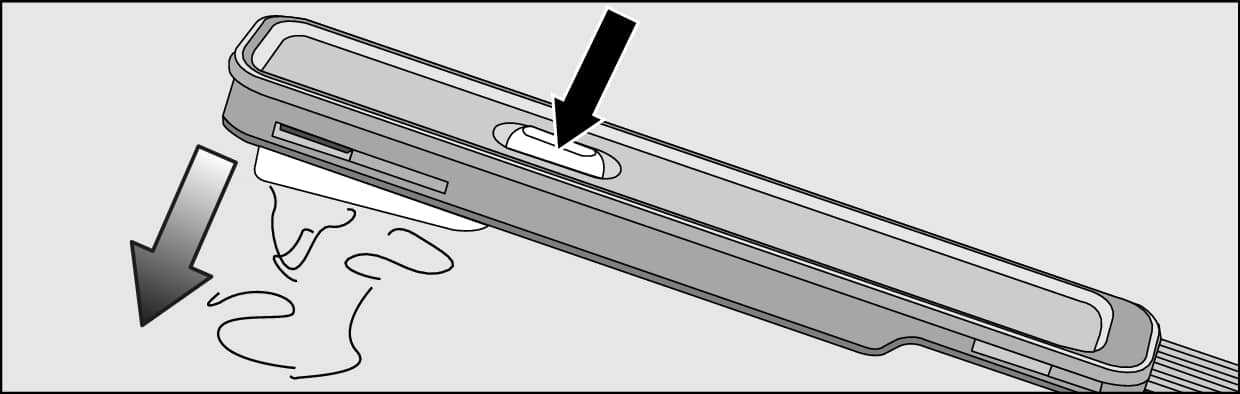
Clean the roller brush as required. For this, you will require the cleaning tool which is located at the top of the dust box lid.
Place the robot vacuum cleaner upside down on a level, clean surface.
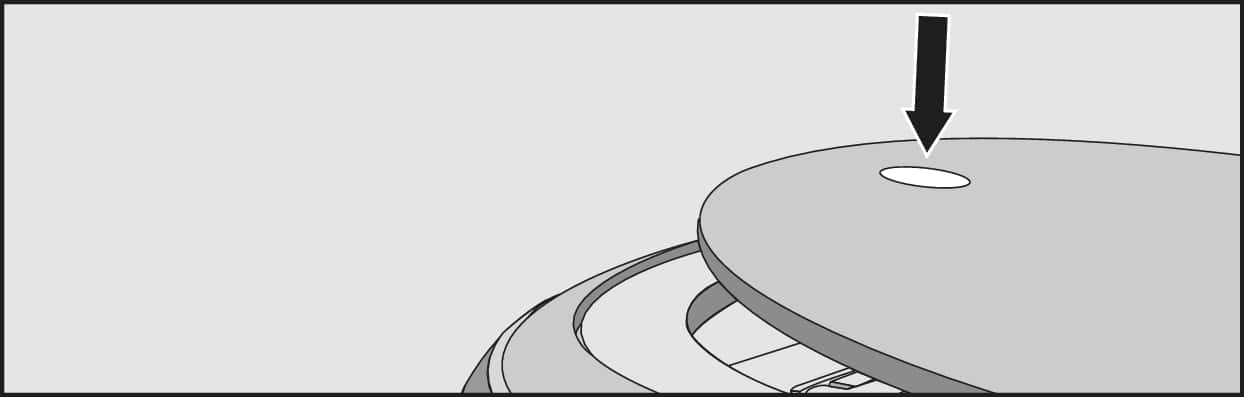
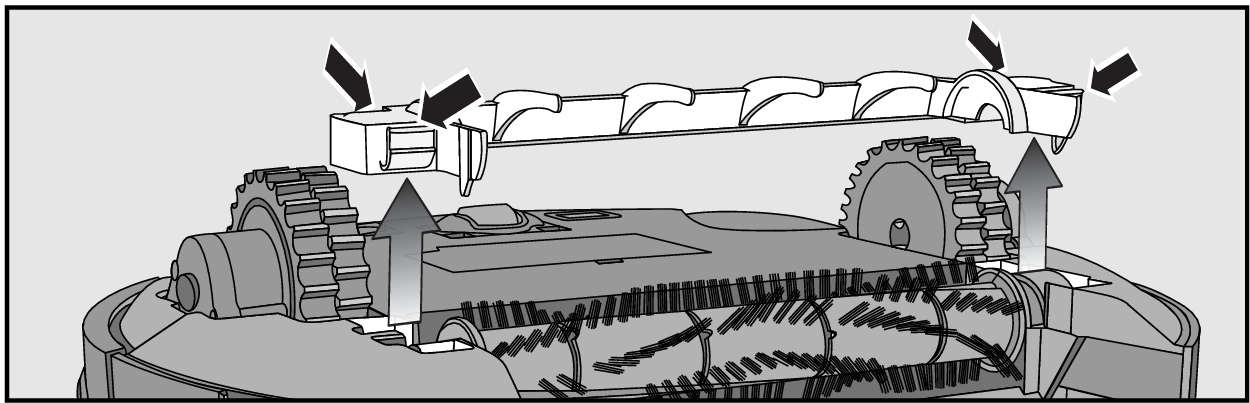
Using both hands take hold of 2 opposite elastic Corner Brush holders and pull them upwards to remove them.
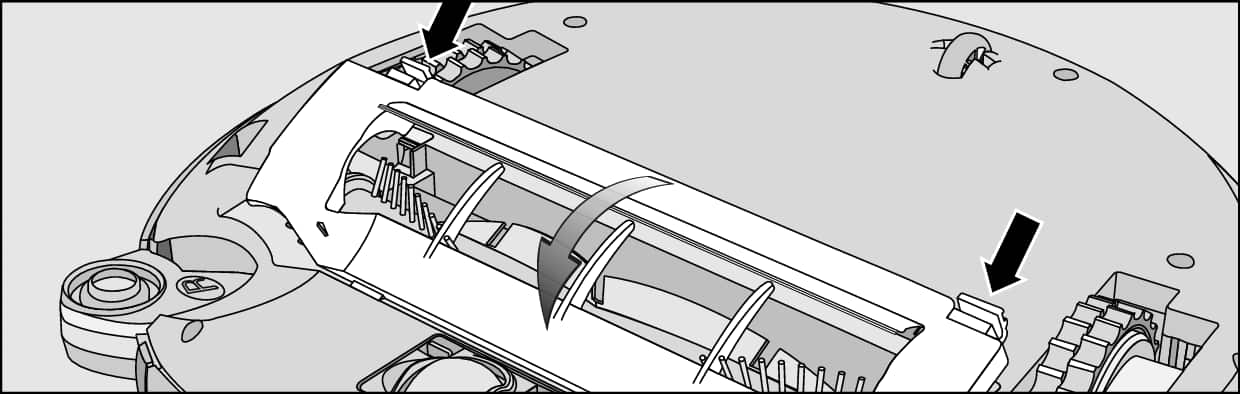
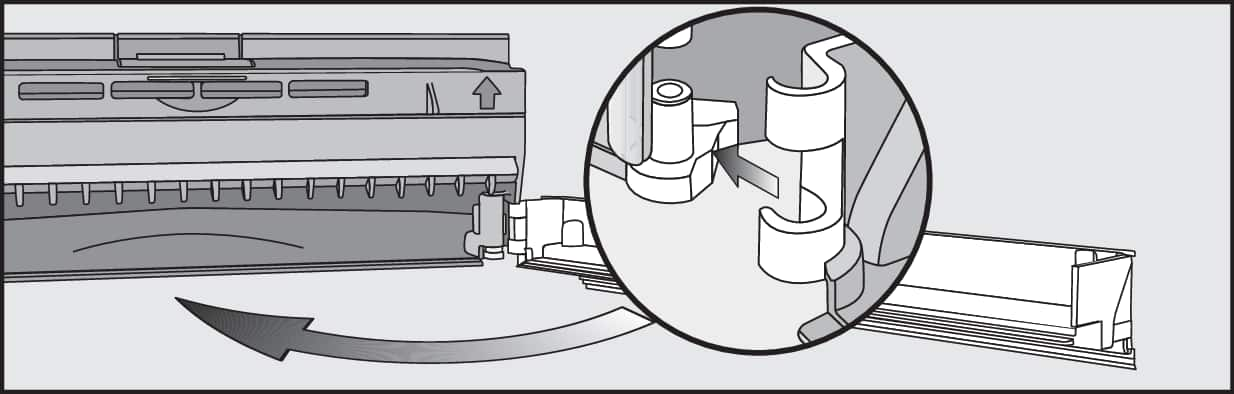
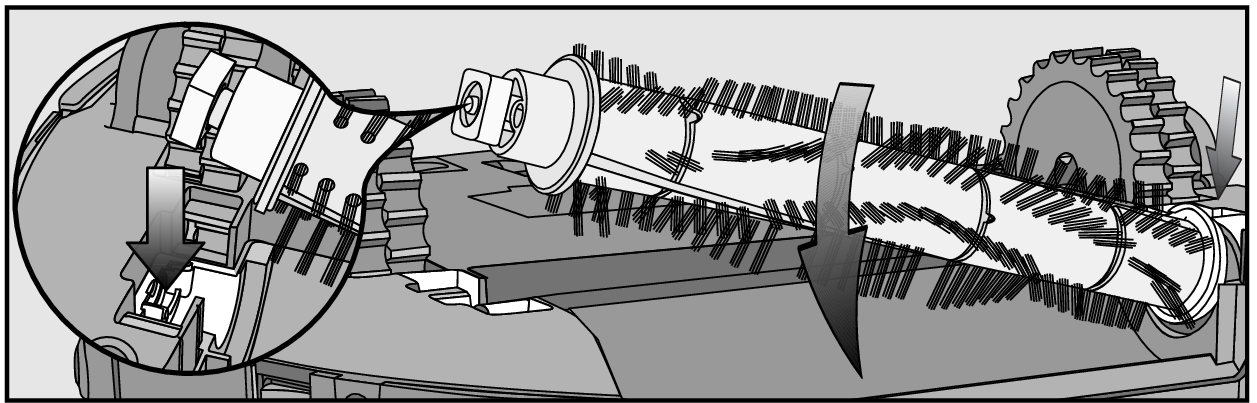
Release the roller brush cover and remove the cover.
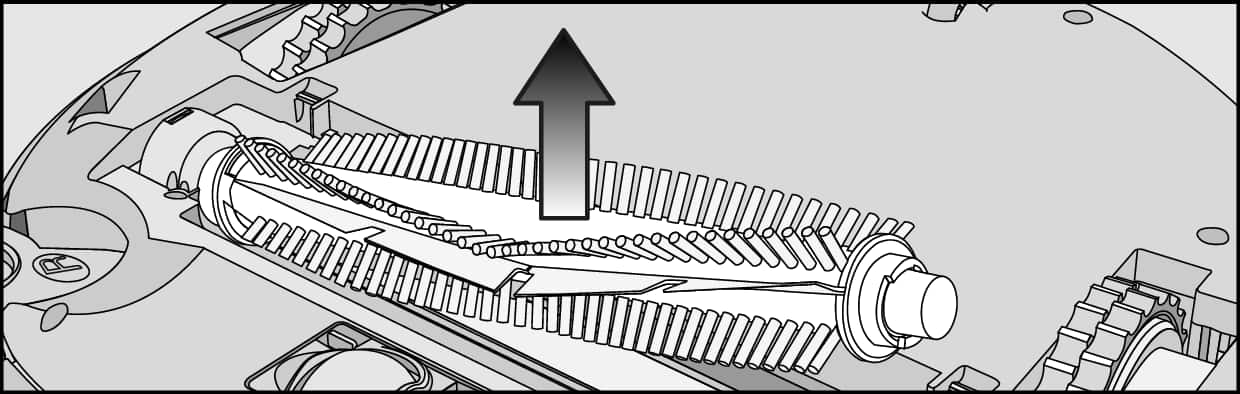
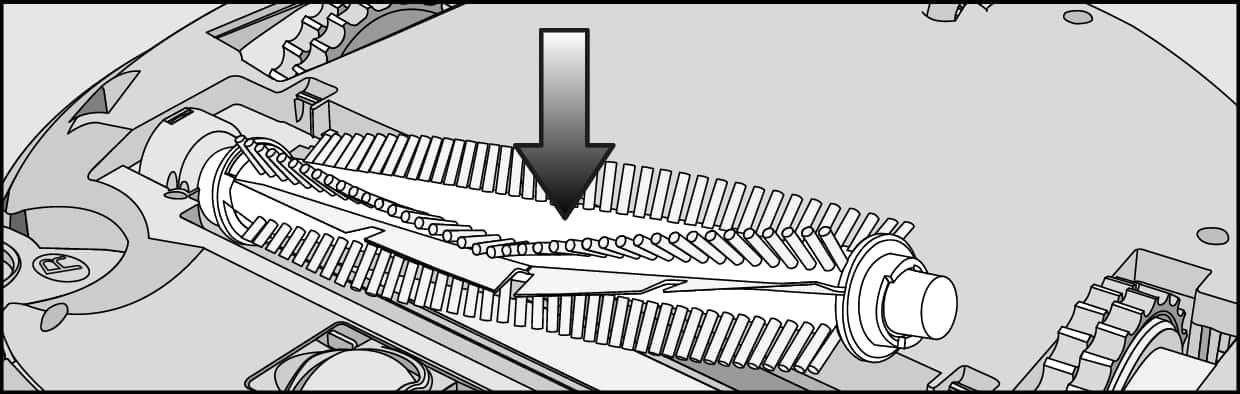
Remove the roller brush.
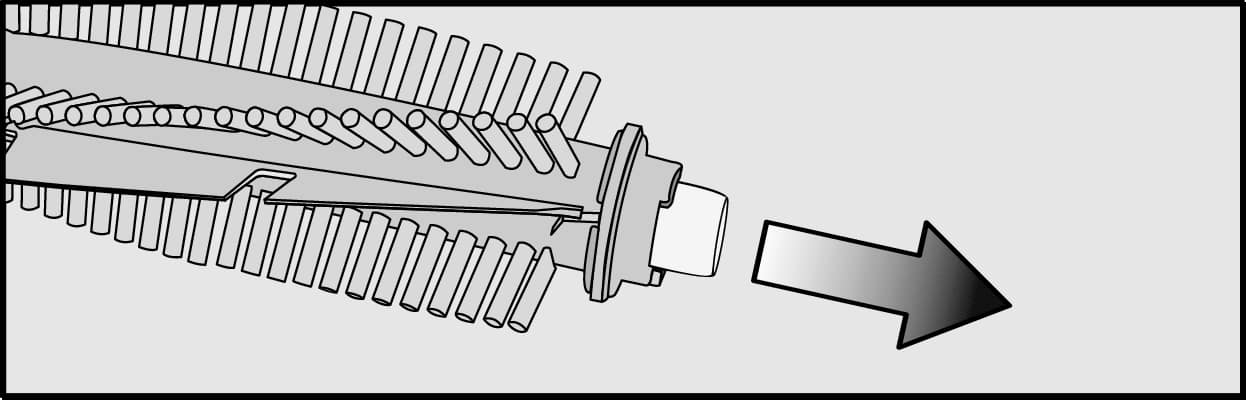
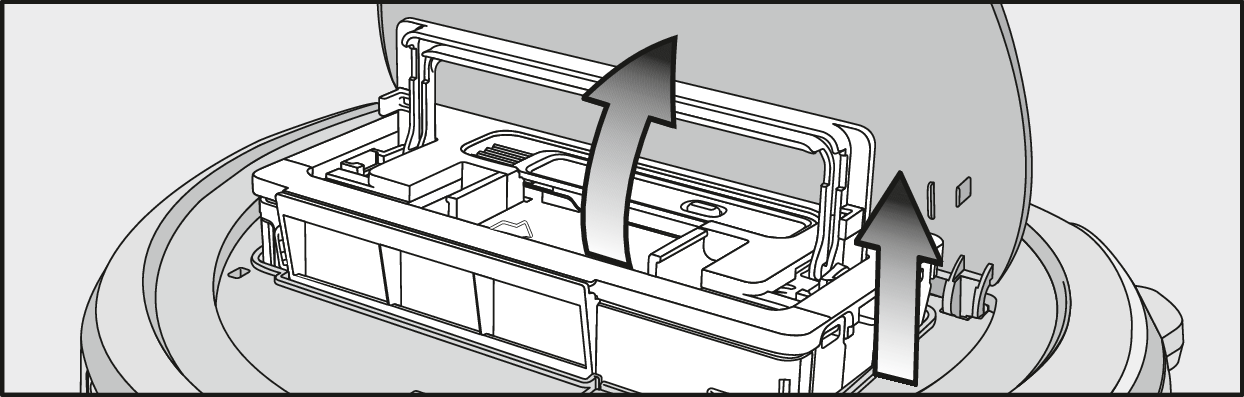
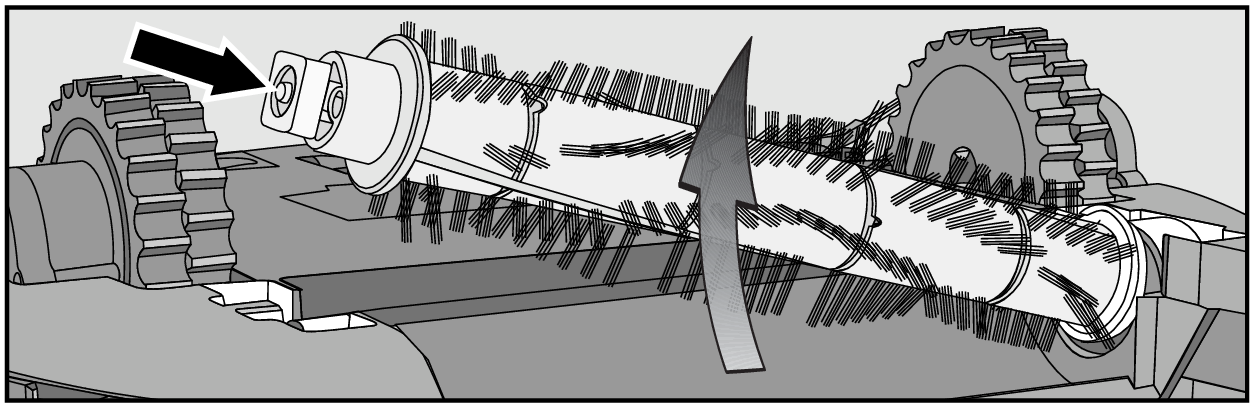
Pull the bearing cover off the roller brush and remove any threads or hairs that have wound themselves around the bearing.
Refit the bearing cover, making sure it clicks into position.
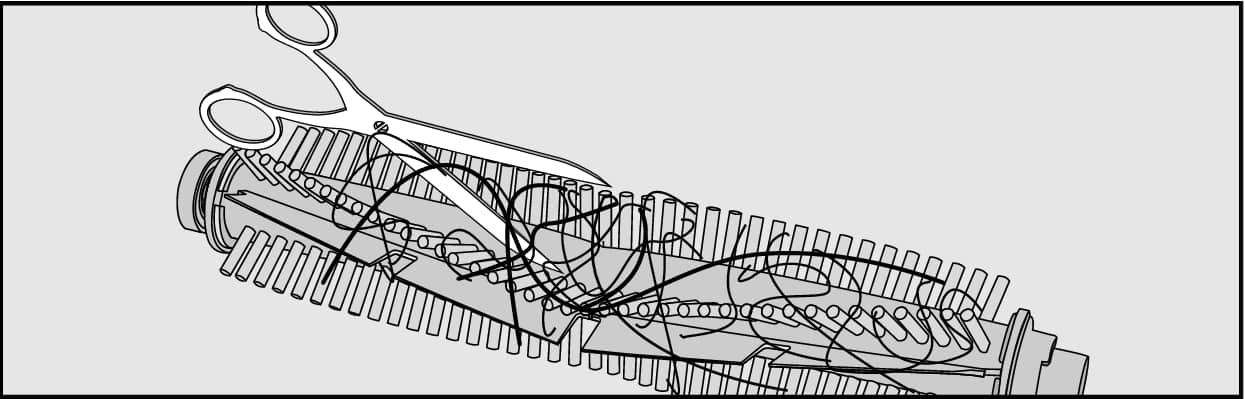
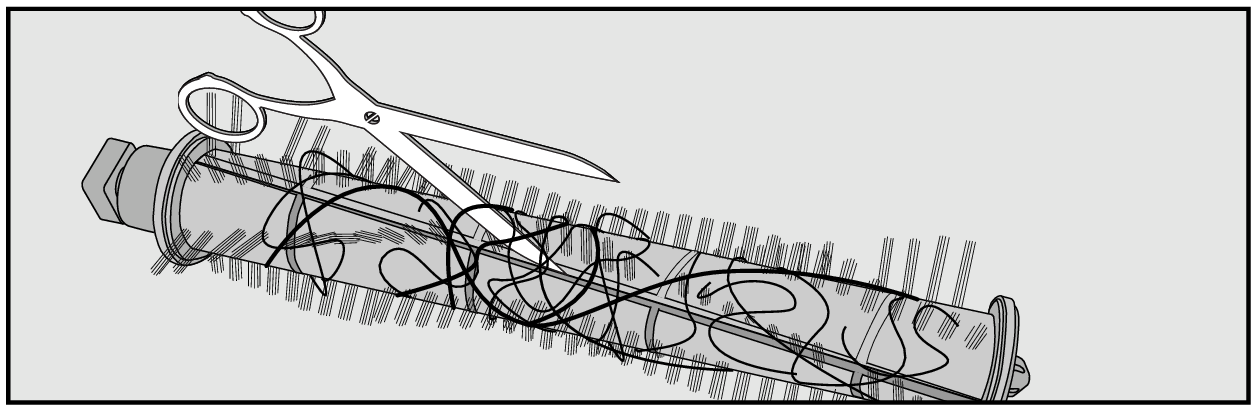
Cut any threads or hairs that have wound themselves around the roller brush with a pair of scissors.
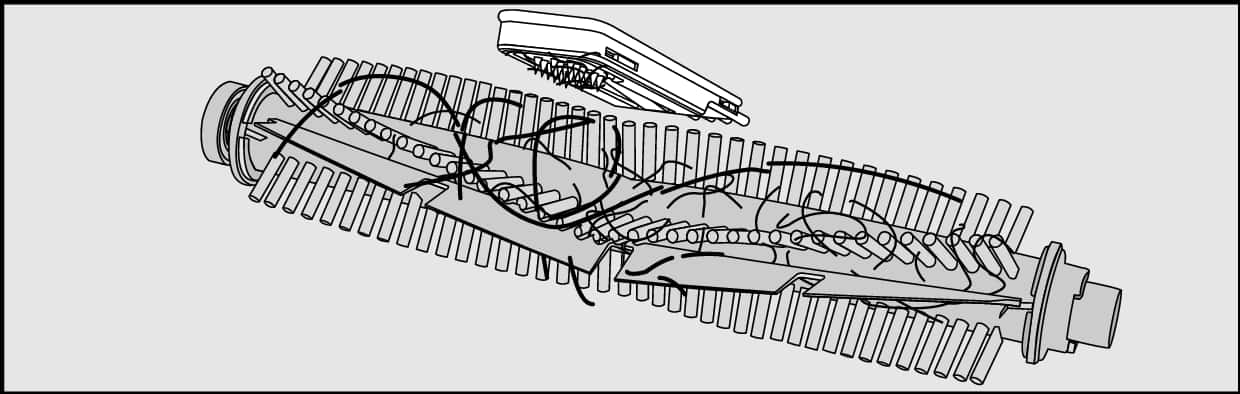
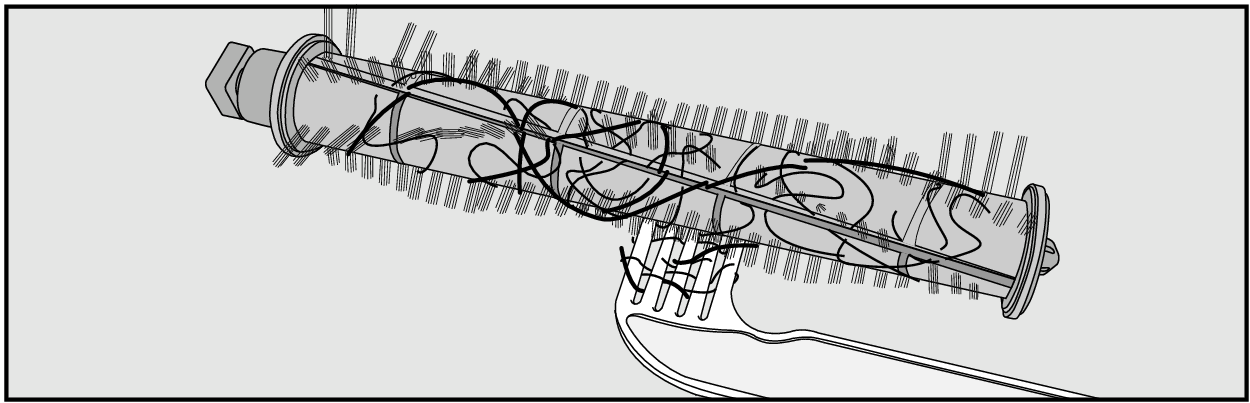
Remove the threads and hair using the wiper which is located on the bottom of the cleaning tool.
Hold the wiper over a bin.
Press the button at the top of the wiper several times until all threads and hair have fallen out.
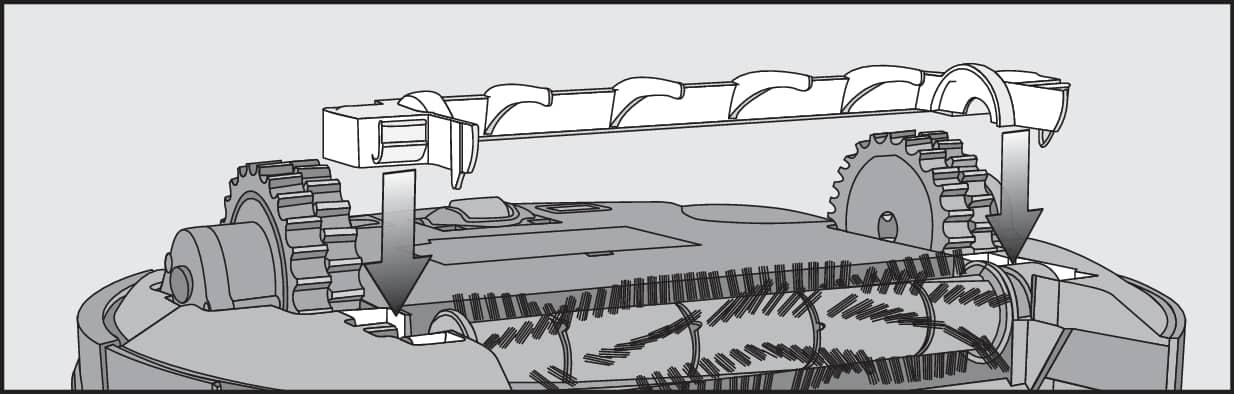
Refit the roller brush with the bearing cover attached. Make sure that the side with the pointed end is inserted into the corresponding slot.
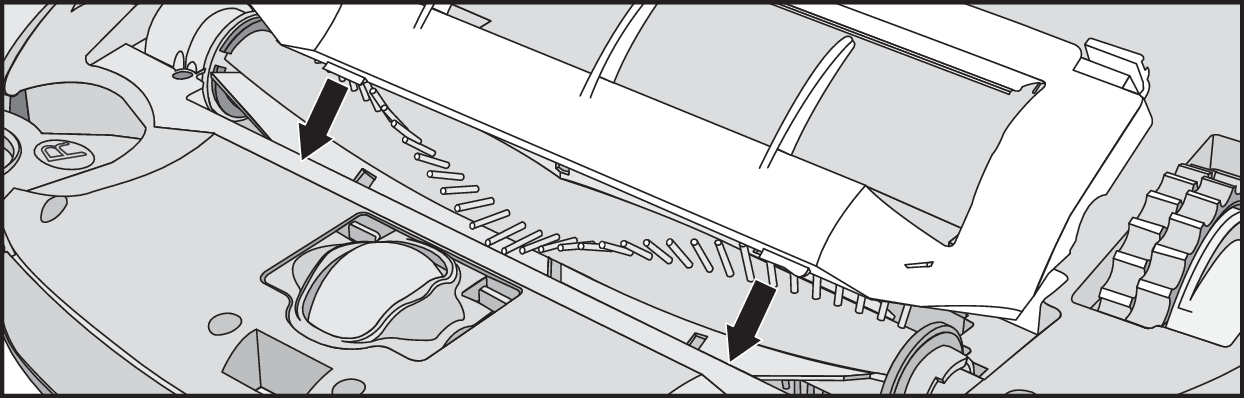
Carefully refit the roller brush cover on both sides, making sure it clicks into position.
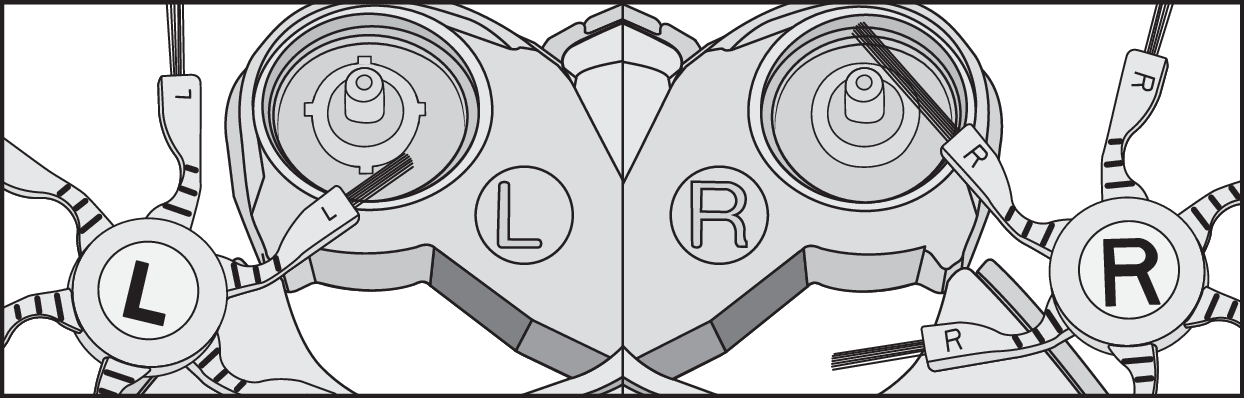
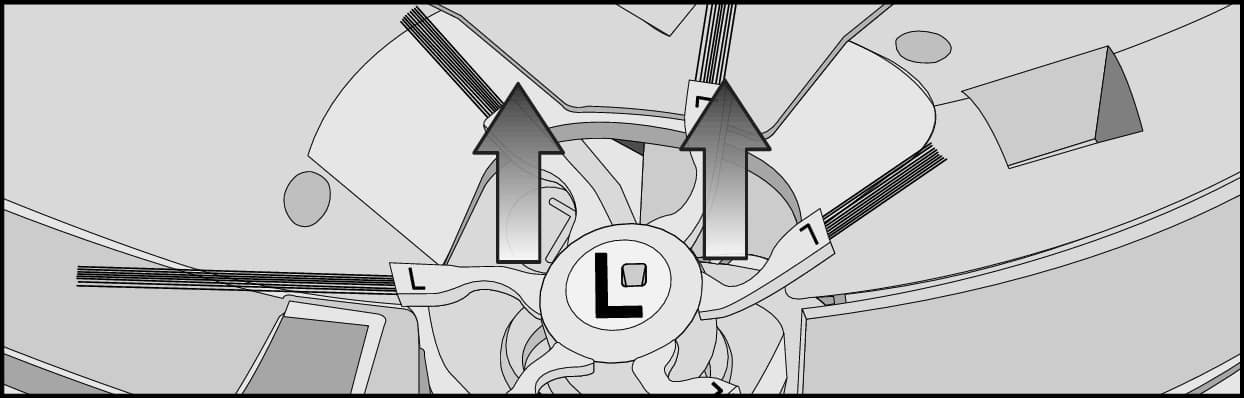
Press the two side brushes carefully onto their pins until they audibly engage. Take care to comply with the markings L and R.
Cleaning the RX1 roller brush:
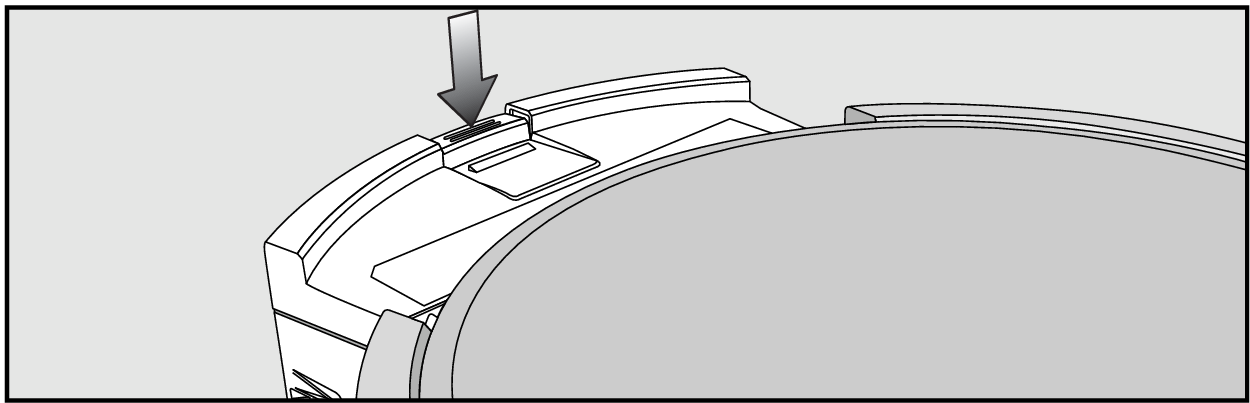
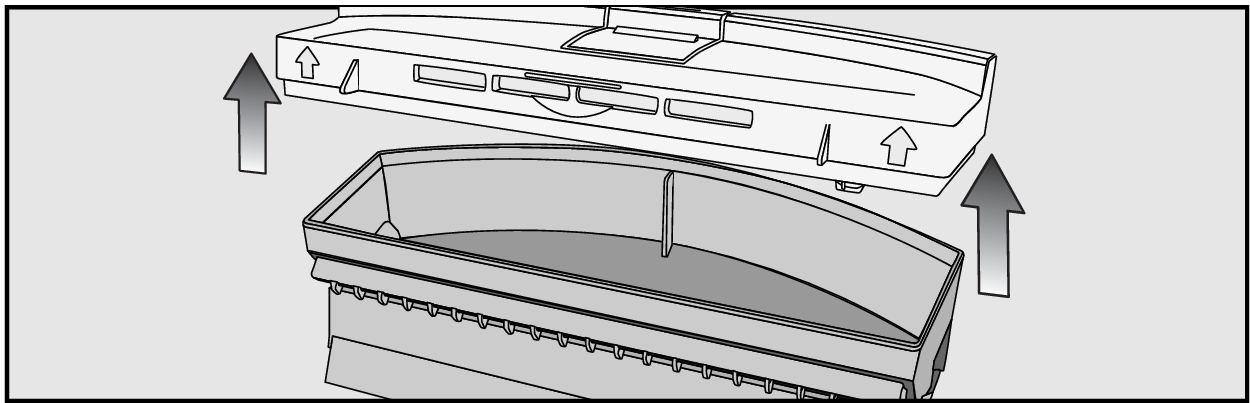
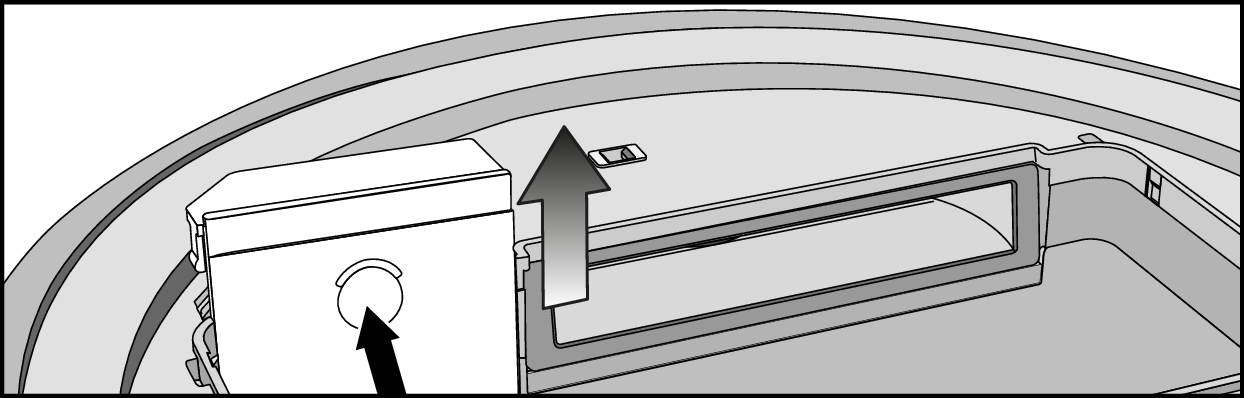
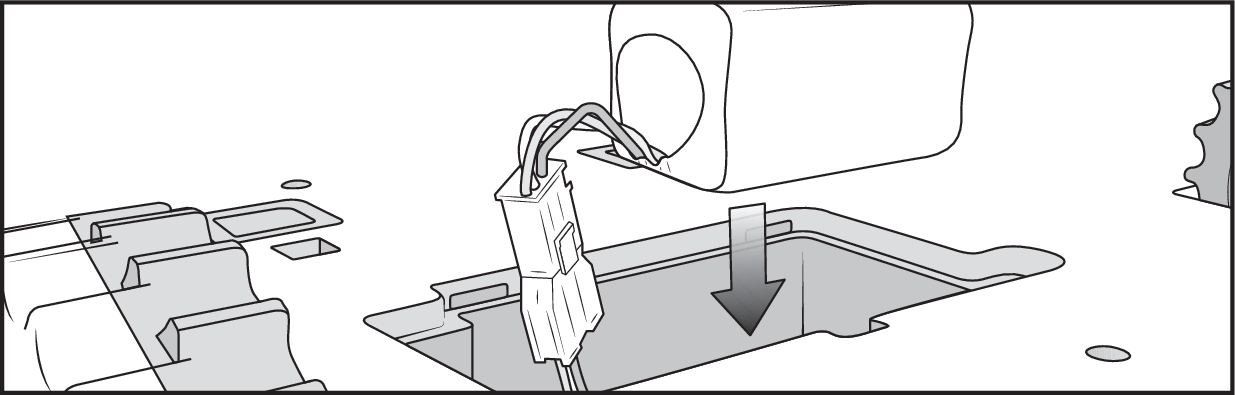
Remove the dust box and place the robot vacuum cleaner upside down on a level, clean surface.
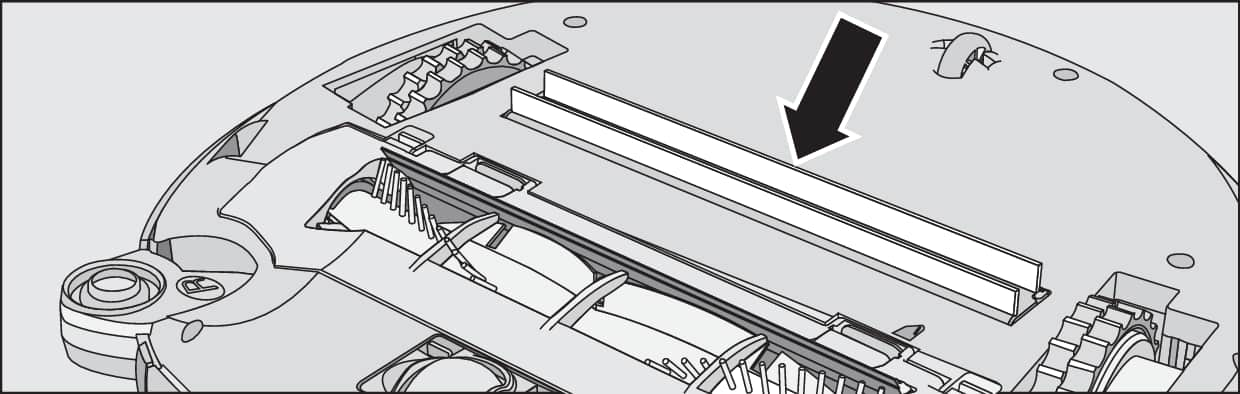
Remove the roller brush cover.
Remove the roller brush.
Take care not to lose the square guide.
Cut any threads or hairs that have wound themselves around the roller brush with a pair of scissors. To guide the scissors, move along the guide track in the roller.
Remove the threads and hairs with the comb end of the cleaning brush.
Refit the roller brush.
Make sure you position the roller brush carefully and that the square guide is attached.
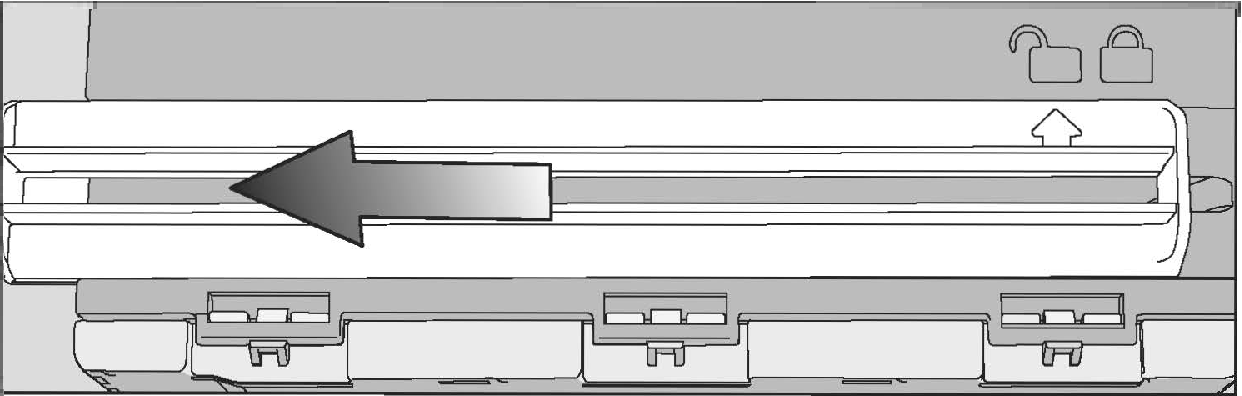
Lock the cover, making sure it clicks into position.
Refit the dust box in the robot vacuum cleaner, making sure it clicks into position.